

Docs
Everything you need to install, configure and ship a Grid FX gallery.
On this page
Getting started
Welcome to the online help and documentation for GridFX. If you have just purchased GridFX, please browse the following docs to get started as soon as possible with the plugin
Installing GridFX
If you have just purchased GridFX, please make sure to download the most updated version of the plugin (Get Latest Version) The first step is to make sure you already have the latest code running from here. Installing GridFX on your WordPress site- Find you purchase code to access updates and support. If you bought this plugin, see the following image tutorial to find your item purchase code. You will also need your purchase code to activate your copy.
- Download the latest version from customer portal
- Install the plugin to your WordPress plugin (either via your WordPress dashboard or FTP to /wp-content/plugins/ folder)
Activation
Activate your Copy of GridFX- To activate purchase code, visit the plugin’s GridFX Tab under GridFX menu.
- Next, to retrieve your Purchase Code, visit the email you received after purchasing the **GridFX** and Copy the purchase code.
- Then paste your Purchase Code into “Envato Purchase Code” Field and Click on Verify Button.
- And then the text color will change to green, which means you’ve successfully registered your copy of GridFX.
Update your GridFX Plugin
IMPORTANT! Never uninstall/reinstall the plugin, as that would also delete your previously built grids. Instead, as long as the following instructions are followed, any previously built grids will be saved and still exist once the update process is complete. Update via WP Dashboard- First find out what version of the plugin you’re currently using .
- If it’s the older version, click on “update now” link listed in the plugin’s description as shown in the following screenshot.
- And you are done.
- First you need to download the latest plugin and save in some folder in your system.
- Take a Backup of old Plugin by renaming it.
- Go to your WordPress Dashboard -> Click on Plugins Tab -> Add New -> Browse the location of plugin zip -> Install the latest plugin -> Activate.
- Then if you want, you can delete the older version of plugin.

Create a grid
We are going to help you master the Grid FX plugin in minutes, learn implementation methods, options and parameters and more.
GridFX Configuration Settings
Below are some configuration settings which are required to create a Grid: First we have to click on Add New menu of gridfx then it will show the setting page from where we can design our own grid.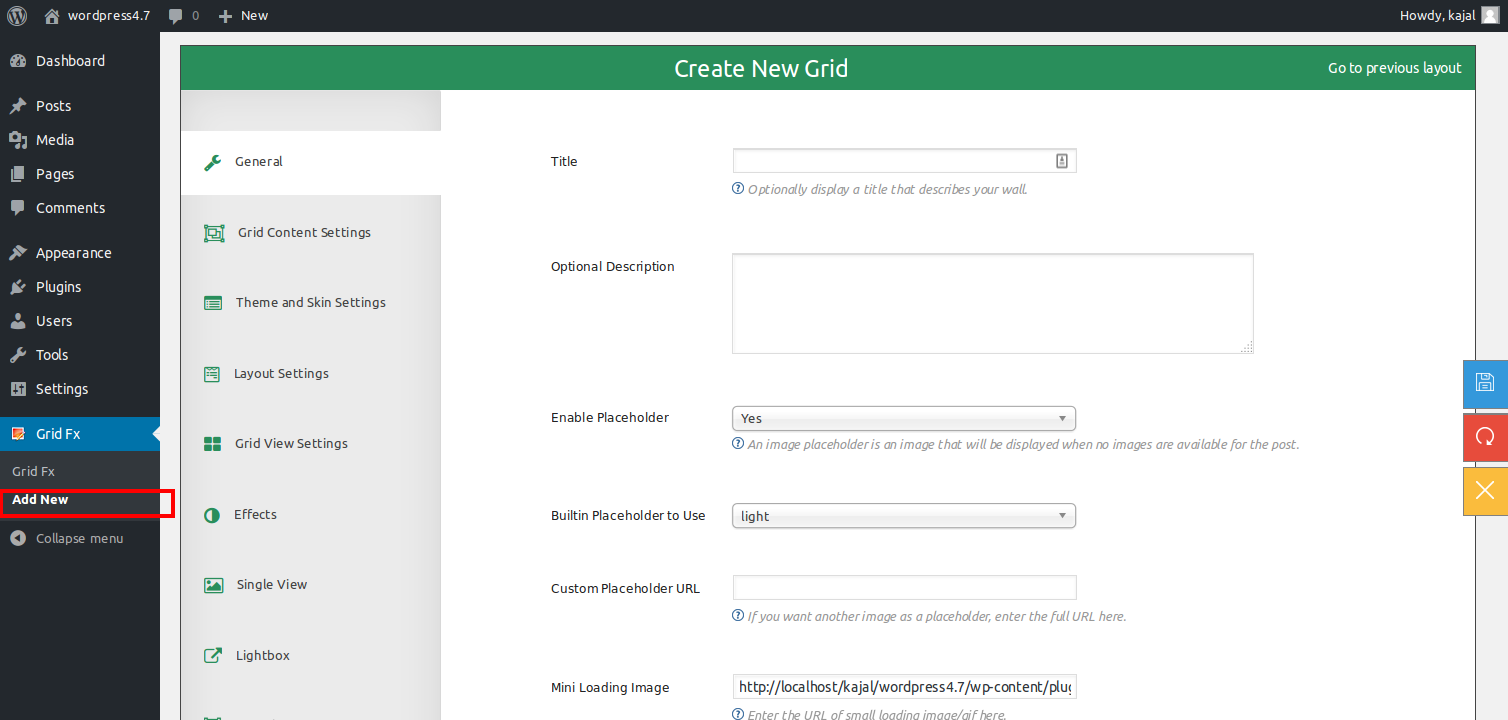
General
From this tab we can set some basic settings of grid:- Enter title for Grid
- Enter Description for that particular Grid
- You can Enable Placeholder that is an image that will be displayed when no images are available for the post
- Save the Grid settings to create the required Grid

Grid Content Settings
By using Grid Content Settings tab we can set the integrations with specific wordpress plaform. Like woocommerce, flickr, facebook, youtube, twitter, vimeo etc. Also we can set the category relating values.Social Media Integration
We can have the grid content from some external sources like mentioned below- WooCommerce
- Flickr
- Youtube
- Vimeo

Post and Media Integration
For creating the grid by using the Post and media we have to first set the ‘Out of box Integration‘ to None. Also we have to select post or media source. After that if we want to create grid of some specific category the we have to select that categories also. Even we can exclude some specific categories also so that grid will not get the media of that particular categories.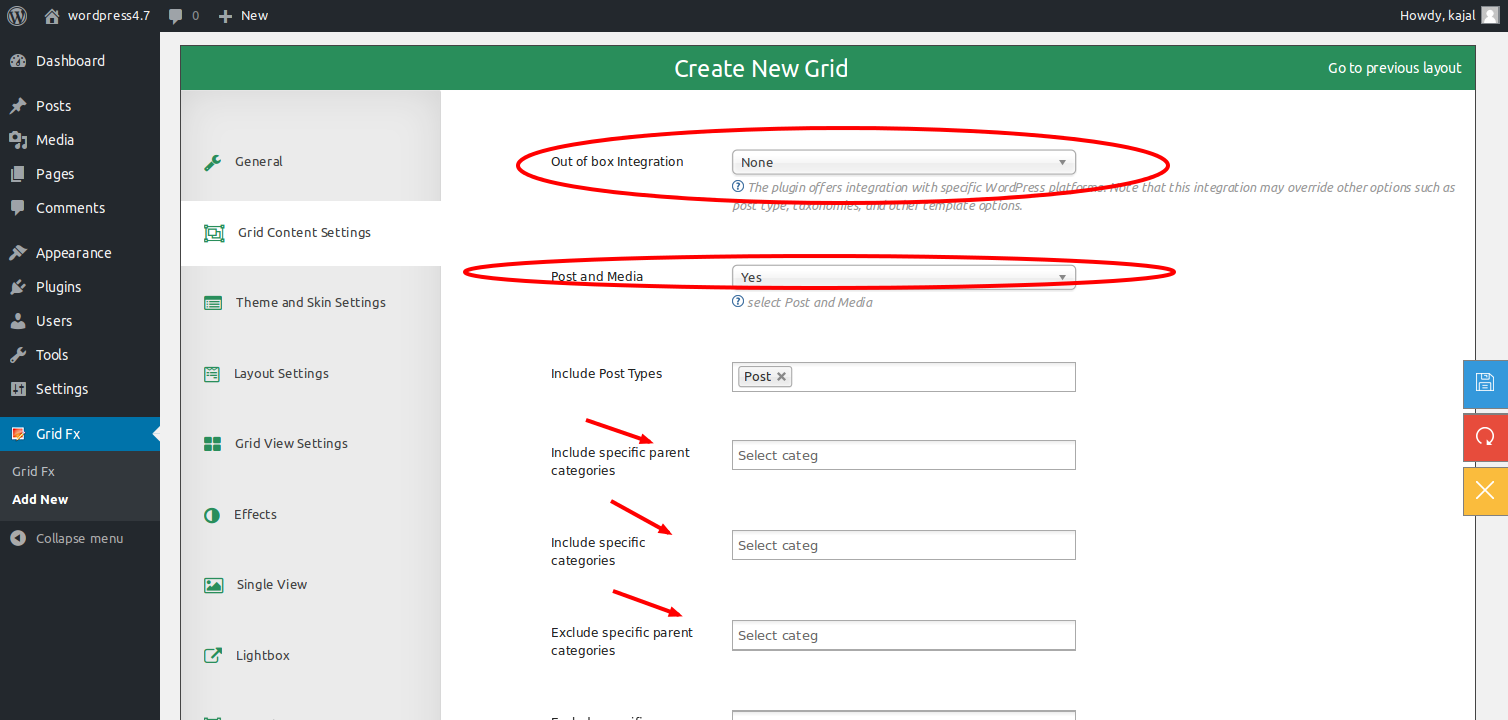
Grid Content Styling
We can have different methods to have different styling for Grid content.Theme and Skin Settings
There are several themes which we can use- Dark-extended
- Dark
- Light-compact
- Light
- Slim
- Multirow
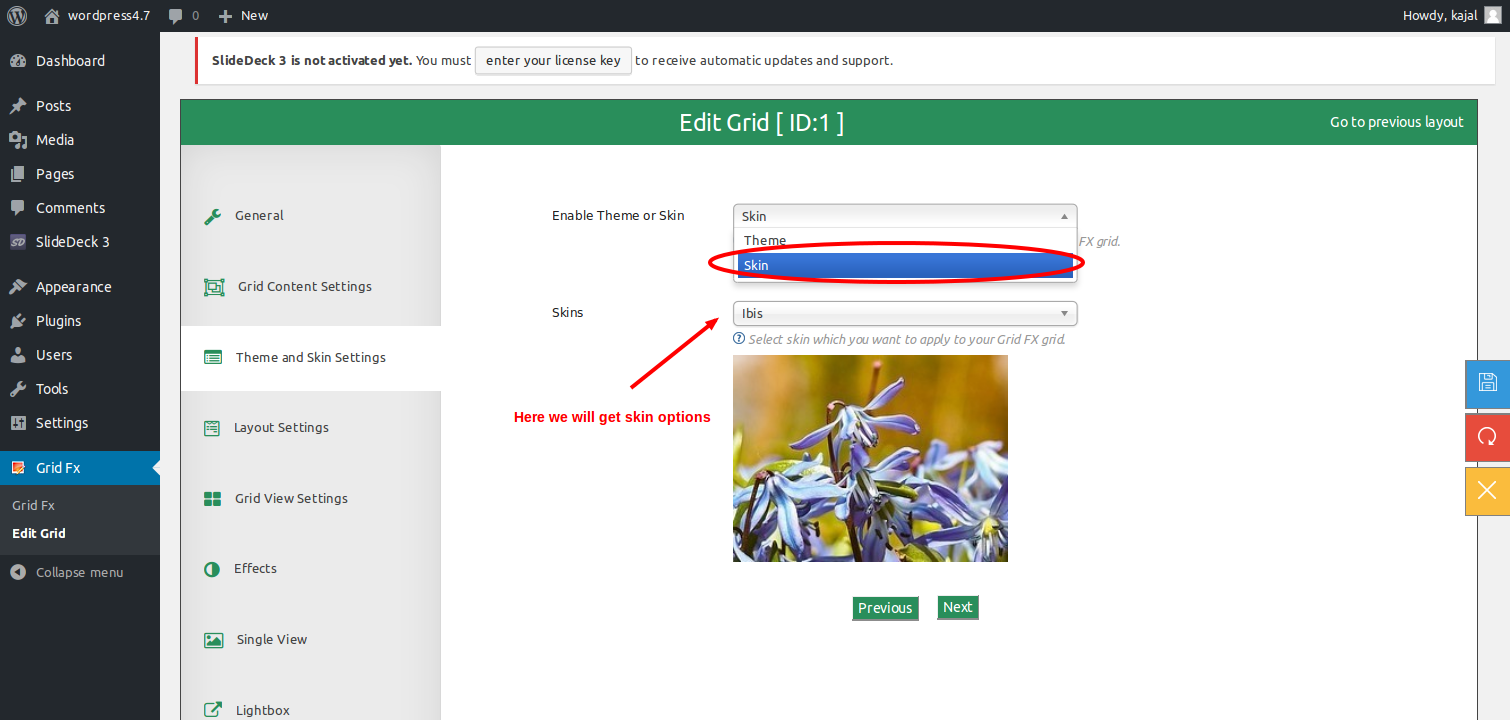
 We also have multiple skins to be applied for the Grid content to make our grid more beautiful.
Effects
There are various Trasition Effects like zoom-in zoom-out, flip which can be applied to the Grid content and viewed on hover of Grid images.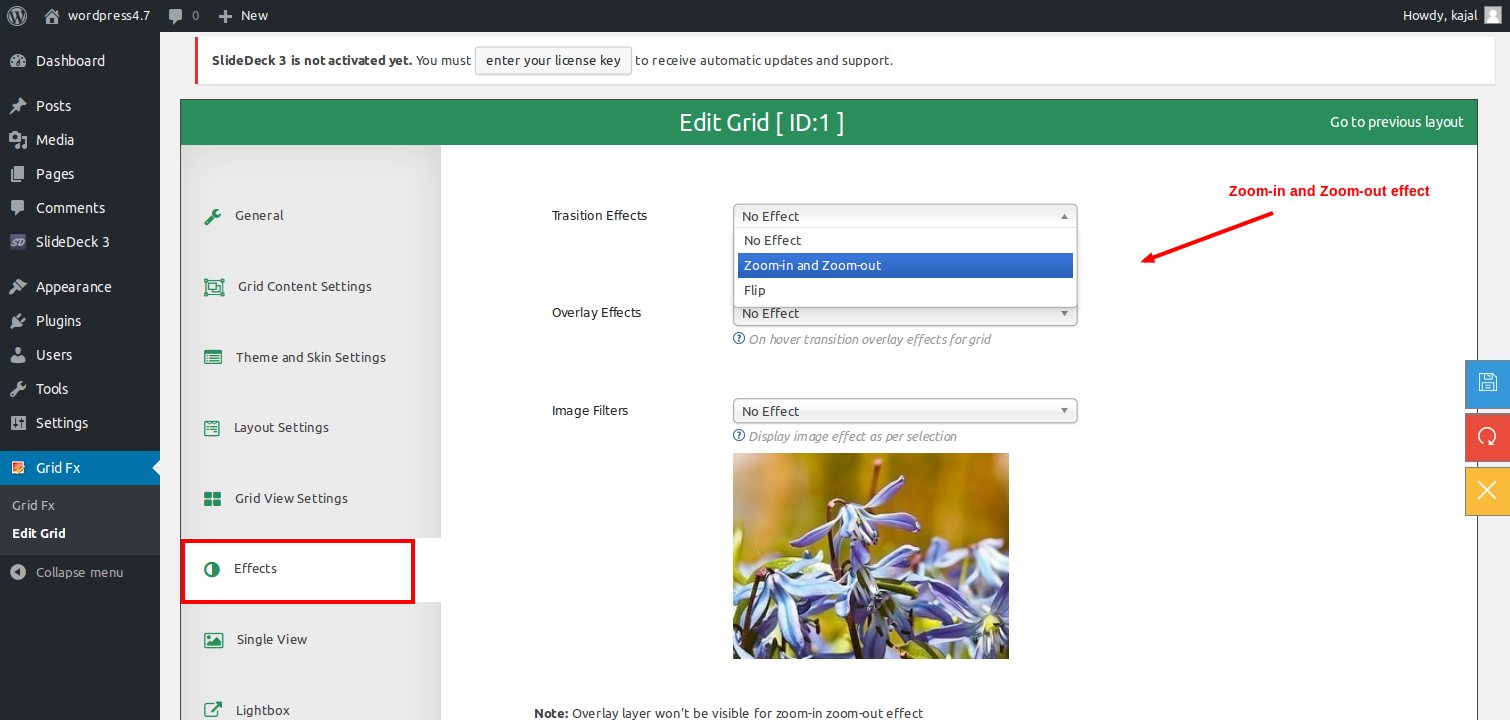 There are Overlay Effects which will be applied on hover of Grid images. The overlay layer will slide from various directions namely top, bottom, left, right
 Even there are Image Filters which will be applied to the Grid images on load itself.

Overlay Settings
Overlay settings will have various parameters to control the behavior of overlay layer on the images of Grid. Some of the settings are Enable views, comments, likes, title on overlay, Overlay title animation, Custom CSS etc.Layout Settings
Layout settings are settings which will help the layout of Grid. Some of them are fonts, margins, image cropping, custom CSS for the Grid.Grid View Settings
These are the settings to control the view of entire Grid. Some of them are like total columns that should be displayed, width of each item in the grid, title, tags, filters etcSingle View
These are the settings which will decide how the single item of Grid will view. These are namely theme, enable content display in full view, container width, left side width, right side width, enable likes, comments, views etc.Lightbox
These are the settings which will control the lightbox pop-up which will appear on click of the Grid image.Search Settings
Using this setting we can enable or disable search feature.Filter Settings
Helps to control the filter settings like position of filter, enable sort filter, enable Taxonomy/Category filters etc.Navigation Settings
This controls the navigation settings like number of post per page, enable pagination or not, page numbers, load more button text, text displayed when the entire content is displayed etc.FAQ
Read some frequently asked questions.
What does Grid FX plugin do?
Grid FX plugin lets you create beautiful content walls on the fly using a grid or masonry layout. The content can be your posts, images, products, or any custom post type. Grid FX also lets you customize 70+ options and parameters for each wall to give you flexibility and customization.Does this plugin support custom post types and taxonomies?
Yes. Grid FX includes options to customize the post types, and taxonomy/category filtering using isotope method.How can I embed a Grid FX gallery to my post or page?
You can use the default shortcode markup: [gridfx] to include the plugin where shortcodes are supported. Also you can go to the Generate panel to create a customized gallery or grid and get a lively updated markup instantly which you can use to show the gallery where you want.How can I show media (video or audio) on the grid wall ?
First, make sure that you enabled Media under plugin Media settings. Then just enter the media URL in your post and the plugin will do the rest! example: http://vimeo.com/22647358 YouTube, Vimeo, Dailymotion, MP4, FLV, or SoundCloud tracks are supported currently.What is the difference between Settings and Generate pages?
The Settings page lets you edit the default settings or behavior of your Grid FX plugin using the default shortcode [gridfx] however the Generate page lets you create customized Grid FX gallery instances instantly so you can have many Grid FX walls and each wall has its own settings, style, etc.How can I link to the post permalink?
The plugin has 3 options to display custom links or buttons on your grid view or single view. They are: item_links, item_extended_links, or single_item_links. The easier option to link to your original post is by enabling Link to Post in your Grid or Single view settings and choose an appropriate option for the link. Also, you can do this manually by passing your item_extended_links option: post|Read the full article this will show a button to post permalink instantly. The markup for entering custom buttons in these 3 fields is like this: post or meta key or URL|text to display|button style. Multiple links or buttons can be separated by commas. Another option to link to post permalink would be to edit the templates loop-single.php and/or single.php in your /templates folder. They are clean formatted HTML files so It is easy to add any custom stuff to it.Can I publish more than one wall on single page?
Yes! Grid FX supports multiple walls on a page without affecting each other. Because each instance has its own options and customization.Where can I edit the template or HTML that is used to display the grid items?
Under templates folder you will find loop.php, loop-single.php and single.php these files are responsible for displaying the grid items or single item view. You can edit them directly, the HTML is clean and separated from code which makes the plugin ultra flexible. In the css.php file, you can alter responsiveness, add some special CSS rules, and so on.Does Grid FX has its own colors and themes?
Yes. Grid FX plugin has its own themes and styles to change the colors and look of your plugin. You can even use a different theme per each wall. To customize the color schemes or create new ones, simply go to templates/themes folder.There are also themes under "single" folder. What are they for?
Grid FX plugin offers two types of themes. There are themes that control the general appearance of the grid view, and there are themes that control the appearance of single item when you expand an item details. This means you can have different styles for grid view, and different style for the single item or full view to give you maximum flexibility.How can I change the grid background or other CSS?
You can edit the theme in use using any text editor and modify the CSS. The themes can be found in templates/themes folder. You can also create new themes and use them in your grid by customizing the theme option when you generate a new grid shortcode.Where can I find or edit buttons styles and color schemes?
You can view/edit/add button styles by editing /css/gridfx-buttons.css file. You can see button themes in that file. Button themes are useful when creating custom button template in the shortcode.Tips & tricks
Some Tips and Tricks
How can I change the theme or skin for my grid like you do in demo?
You can do so by selecting Theme in setting ‘Theme and Skin Settings‘ which is present in tab ‘Theme and Skin Settings‘. The available themes can be light, light-compact, dark, dark-extended.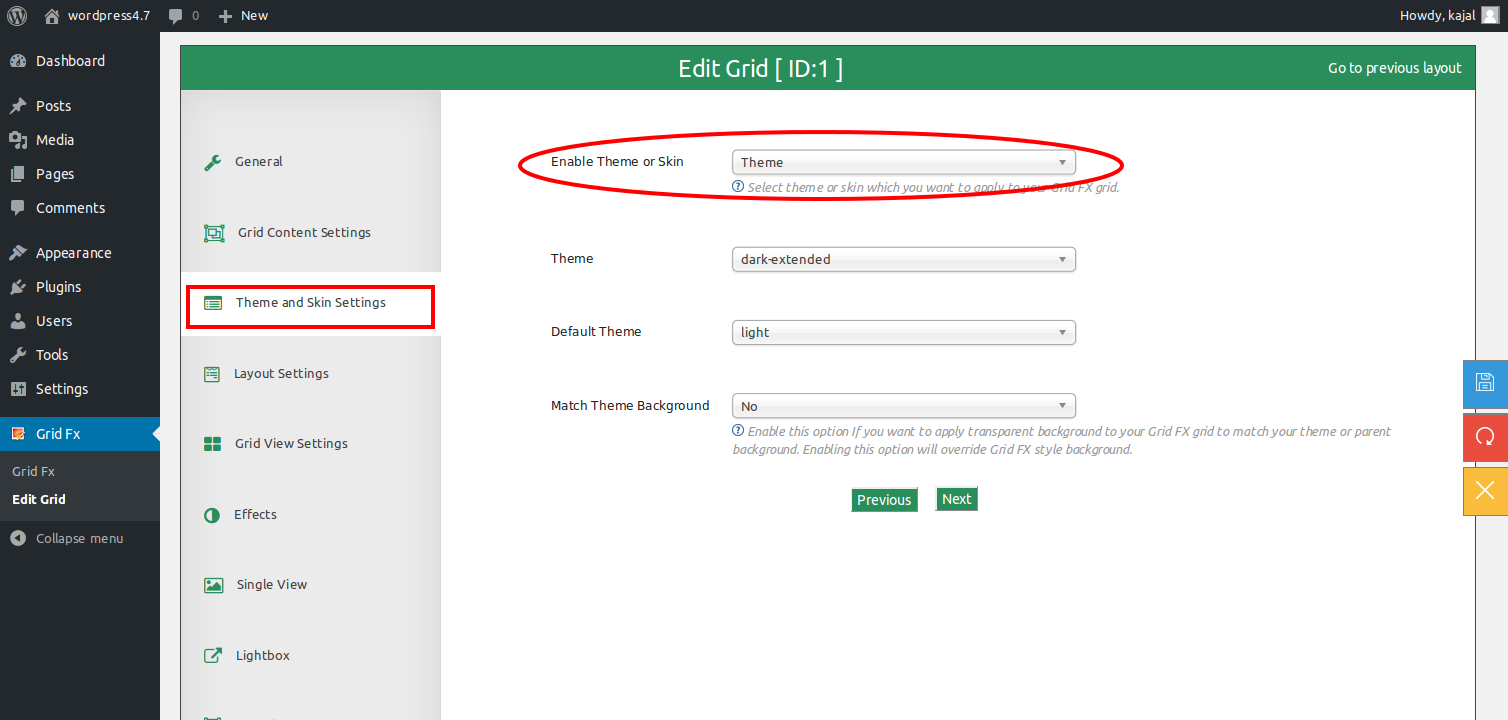
I want to customize the width of grid
By default, the width of your grid will take 100% width of its container. So If your content width is 1000px, the grid will use that space. It is responsive and dynamic to its parent element width. However you can control the width of your grid by setting the width in ‘Items Container Width‘ from tab ‘Grid View Settings’.
I want to change the number of columns. Which option I should use?
You can change the number of default columns in grid by customizing the columns parameter.
How can I create video items or gallery?
You only need a valid video URL (e.g. http://vimeo.com/27627335) in your post content. The first video URL will be used as your media item in a gallery. You do not need to insert iframes, objects, or anything. just the video URL. A post with valid vimeo URL will be automatically converted to media item in your gallery. After that you have to add the post category into the ‘include category’ setting.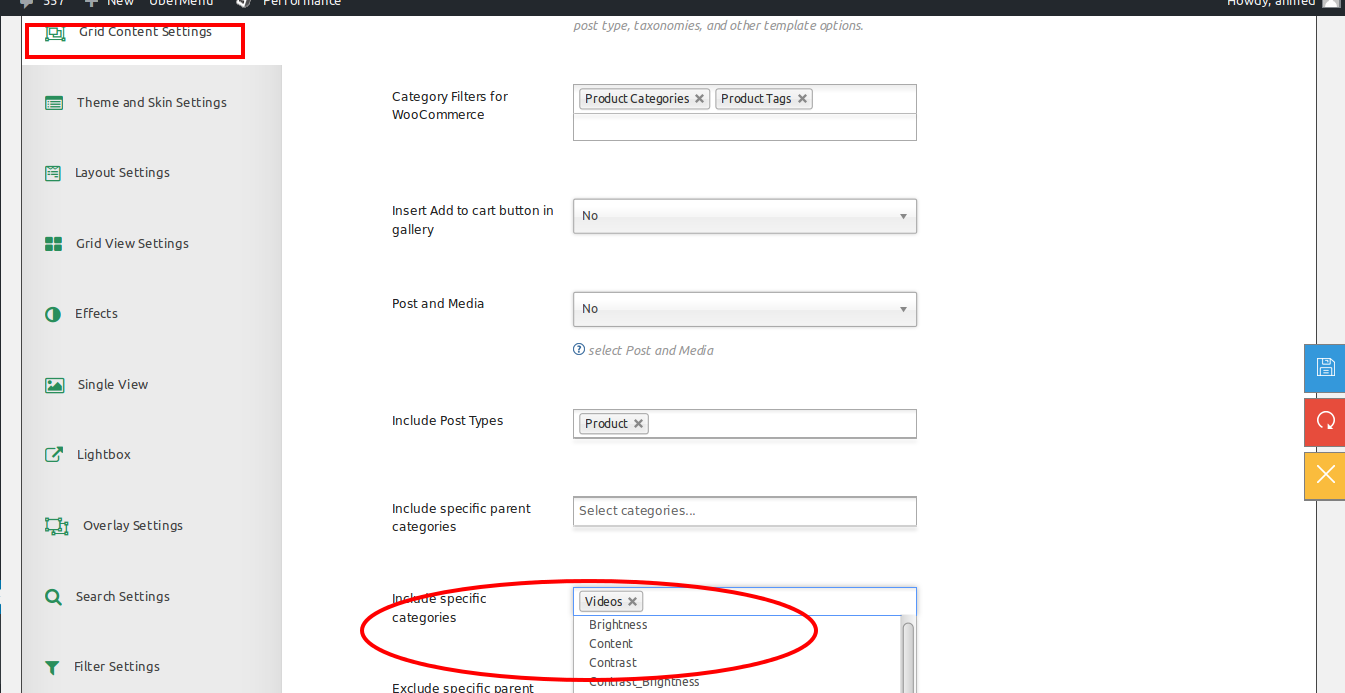
How to create a shortcode?
To create a shortcode for new grid, firstly we have to open the gridfx menu Add New or click on Create New grid which we will see above the grid table in gridfx menu Grid Fx.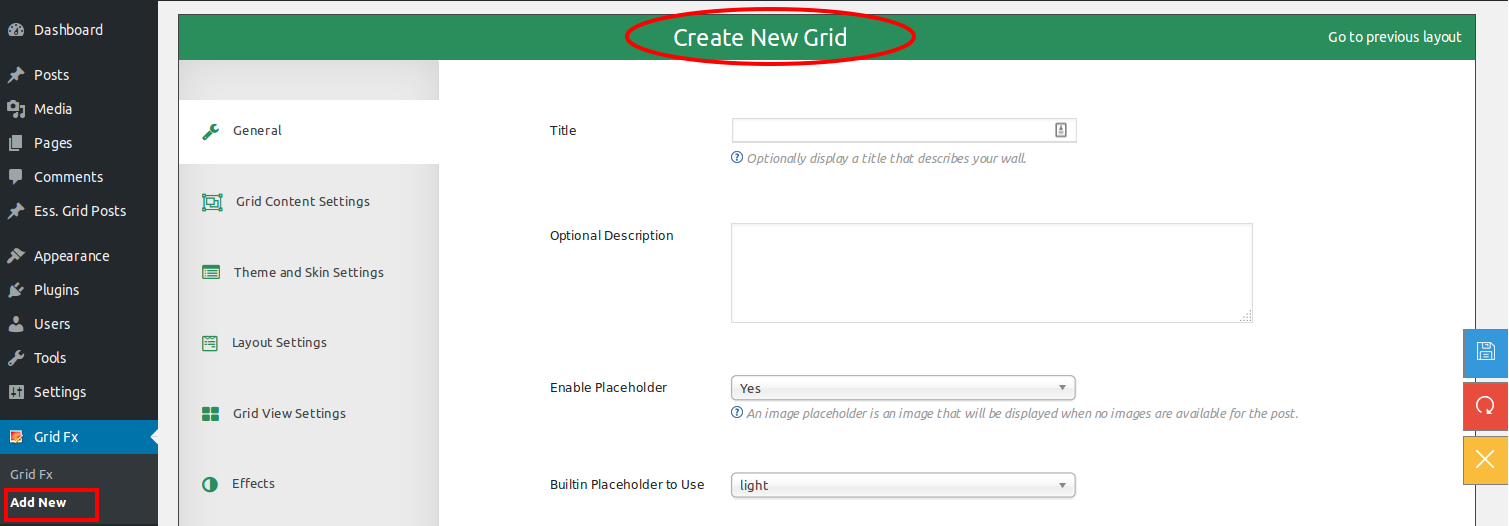
 Here we will get all setting to create a grid. We have make changes according to our requirement and then just save it… It will give you one shortcode.
 This shortcode we have to copy in our page or post to make a beautiful grid.
Ready to build?
Grab Grid FX on CodeCanyon and drop your first gallery in under an hour.